Appearance
Implementing LiveOps Events
This page describes how to implement in-game events that can be scheduled and configured via the LiveOps Dashboard.
Appearance
This page describes how to implement in-game events that can be scheduled and configured via the LiveOps Dashboard.
Note
LiveOps Events are under active development and not yet feature-complete. They are safe to use in production, but the UI and underlying API will change over the next few releases as we continue to work on them.
Running the LiveOps Dashboard locally - To follow along with this page, you should have access to an instance of the LiveOps Dashboard running on your local machine. Check out the Developing the LiveOps Dashboard guide for more details.
Basic familiarity with in-game Events - We strongly recommend you take a look at the Introduction to Game Events page, so you can get a general idea of how events work and the difference between config-driven and LiveOps Events before proceeding with this guide.
In this guide, we'll implement an example Event where players need to click a button a set number of times during the Event in order to get rewards at the end. This is meant to serve as an example so you can get acquainted with the process and adapt the code to your own gameplay needs.
To define what the event's parameters are, it's necessary to define a subclass of LiveOpsEventContent in the game's server-client shared code.
After that, we need to define a subclass of PlayerLiveOpsEventModel<> in the PlayerModel to hold the state of any player data you'd like to keep track of during the Event while it is active. If you don't need any state for the event, you don't need to define any properties for it - but the class still needs to exist.
For now, we'll define just the data members. Later in this guide, we'll augment these classes with gameplay functionality.
// This defines the configuration of the event, configurable via the LiveOps Dashboard when creating the event.
[LiveOpsEvent(1, "Button Clicking Event")]
public class ButtonClickingEvent : LiveOpsEventContent
{
    // How many clicks the player needs to do during the event to get the rewards at the end.
    [MetaMember(1)] public int NumClicksRequired { get; private set; } = 10;
    // What rewards the player gets at the end of the event if the required number of clicks was reached.
    [MetaMember(2)] public List<MetaPlayerRewardBase> Rewards { get; private set; } = new();
}

// This defines the state for the event stored within PlayerModel.
[MetaSerializableDerived(1)]
public class ButtonClickingEventModel : PlayerLiveOpsEventModel<ButtonClickingEvent, PlayerModel>
{
    // How many times the player has clicked the button during the event.
    [MetaMember(1)] public int NumClicksDone { get; private set; } = 0;
}Even before implementing the Event further, it's already possible to get a feel for how the events are created and viewed in the LiveOps Dashboard.
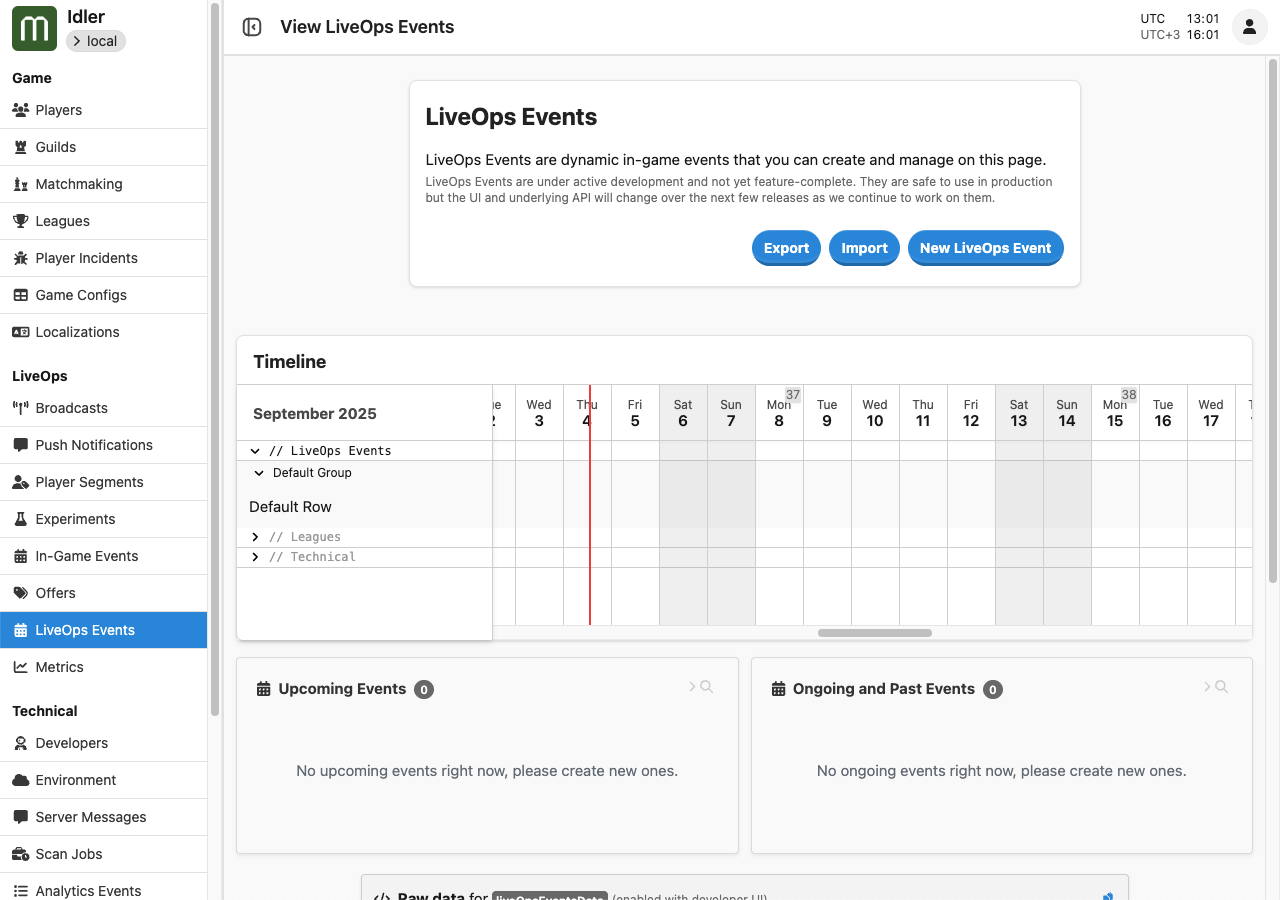
To create an event, run the game's server and LiveOps Dashboard locally. In the dashboard, navigate to the LiveOps Events page through the sidebar. The LiveOps events entry in the navigation menu becomes visible as soon as there are any Event types defined in the C# code.

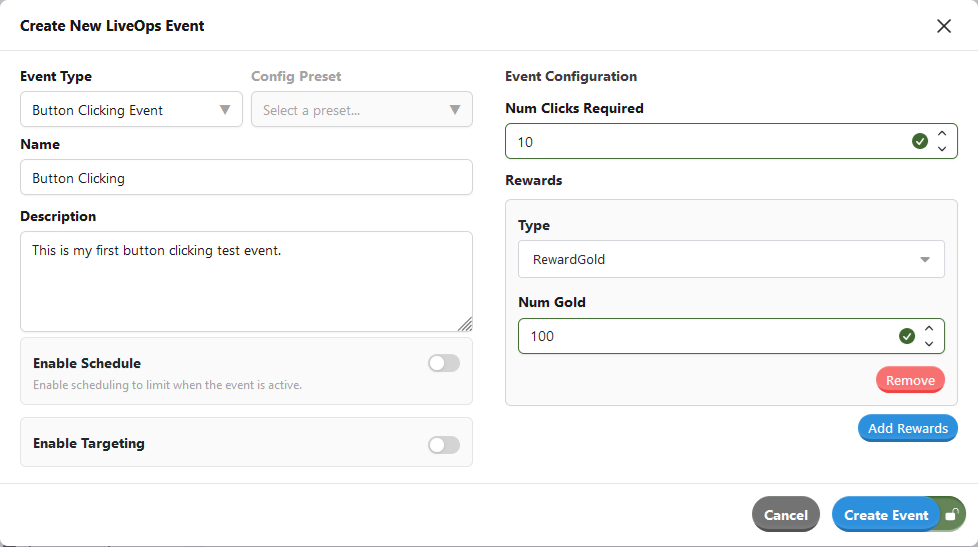
Click the New LiveOps Event button to open a form and create a new Event.
You can select your Event type from the top-left dropdown menu and give the Event a name and description (these are only for the dashboard, not for game clients). On the right, you can fill in values for the custom parameters defined previously in the Event class (in our case, ButtonClickingEvent).

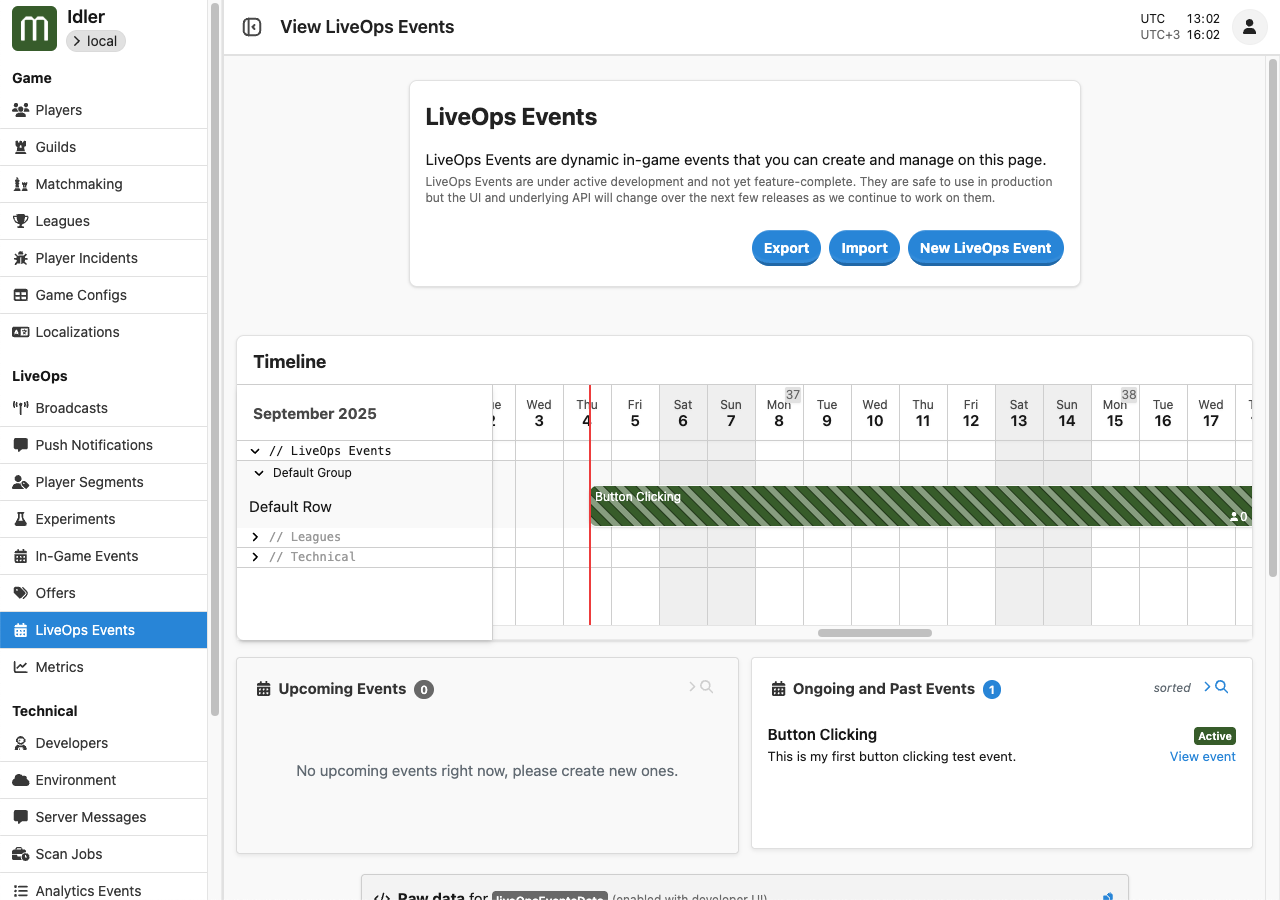
When you're done, by clicking the Create Event button, the Event will be created in the backend and shown on the LiveOps events page. Since we didn't set a schedule for the Event when we created it, it'll immediately become active and available to players.

When you have lots of Events, you'll want to organize them in the timeline view. See Organizing LiveOps Events for instructions.
To make the events show up in the game's UI, we need code that reads the current events from PlayerModel.LiveOpsEvents and updates the UI accordingly. For example, let's say our game has a list showing each Event the player is participating in. This script reads a single Event from PlayerModel and updates its UI:
public class EventListItemScript : MonoBehaviour
{
    public MetaGuid EventId;

    public TextMeshProUGUI ContentText;
    public TextMeshProUGUI PhaseText;

    void Update()
    {
        PlayerModel player = MetaplayClient.PlayerModel;
        if (!player.LiveOpsEvents.EventModels.TryGetValue(EventId, out PlayerLiveOpsEventModel eventModel))
            return;

        // For simplicity, this refreshes the event's UI on every Update().
        // In reality, you could initialize the UI in Start() and then only on subsequent changes to the state.

        // `eventModel` holds the state and client-visible parameters of this event,
        // including its current phase and the custom content defined in your event type.

        PhaseText.text = $"Phase: {eventModel.Phase}";

        // Generally, player.LiveOpsEvents.EventModels contains events of all the different
        // types in your game. Here we handle just ButtonClickingEventModel.
        if (eventModel is ButtonClickingEventModel buttonEvent)
        {
            int numClicksDone = buttonEvent.NumClicksDone;
            int numClicksRequired = buttonEvent.Content.NumClicksRequired;

            // Note: if you have no need to distinguish the EndingSoon phase,
            // you can use the helper method eventModel.Phase.IsActivePhase()
            // which checks both NormalActive and EndingSoon.
            if (eventModel.Phase == LiveOpsEventPhase.NormalActive)
                ContentText.text = $"{numClicksDone} out of {numClicksRequired} clicks done!";
            else if (eventModel.Phase == LiveOpsEventPhase.EndingSoon)
                ContentText.text = $"{numClicksDone} out of {numClicksRequired} clicks done! Event is ending soon!";
            else if (eventModel.Phase == LiveOpsEventPhase.Preview)
                ContentText.text = $"Clicking event coming soon!";
            else if (eventModel.Phase == LiveOpsEventPhase.Review)
            {
                if (numClicksDone >= numClicksRequired)
                    ContentText.text = $"Congratulations, you achieved {numClicksDone} out of {numClicksRequired} clicks! Claim your reward!";
                else
                    ContentText.text = $"You only achieved {numClicksDone} out of {numClicksRequired} clicks. Better luck next time!";
            }
        }
    }
}
Phases and Scheduling
LiveOps Events support different phases and options for scheduling, learn more in Scheduling!
This is a minimal implementation and, for brevity, we're omitting to show how it is wired into a Unity scene.
This script adds and removes the UI items for the events:
public class EventListScript : MonoBehaviour
{
    public EventListItemScript EventListItemPrefab;

    public MetaDictionary<MetaGuid, EventListItemScript> _eventUIs = new();

    void Update()
    {
        PlayerModel player = MetaplayClient.PlayerModel;

        // Remove stale UI items and add new ones, according to what events exist in player.LiveOpsEvents.
        // For the simplicity of this example, this is just a naive polling loop. To avoid polling,
        // you can trigger this only when needed by using the IPlayerModelClientListenerCore interface
        // (explained later in this document).

        // Remove UI items of events that have ended and been removed from player.LiveOpsEvents.

        List<MetaGuid> removedEvents = null;
        foreach ((MetaGuid eventId, EventListItemScript eventUI) in _eventUIs)
        {
            if (!player.LiveOpsEvents.EventModels.ContainsKey(eventId))
                (removedEvents ??= new()).Add(eventId);
        }
        if (removedEvents != null)
        {
            foreach (MetaGuid eventId in removedEvents)
            {
                Destroy(_eventUIs[eventId].gameObject);
                _eventUIs.Remove(eventId);
            }
        }

        // Add new UI items for events that don't have them yet.

        foreach (PlayerLiveOpsEventModel eventModel in player.LiveOpsEvents.EventModels.Values)
        {
            if (!_eventUIs.ContainsKey(eventModel.Id))
            {
                EventListItemScript eventUI = Instantiate(EventListItemPrefab, transform);
                eventUI.EventId = eventModel.Id;
                _eventUIs.Add(eventModel.Id, eventUI);
            }
        }
    }
}
After implementing the UI, the player should be able to see the ongoing events available to them.
Note that due to various server-side polling intervals, it may currently take up to roughly 30 seconds for a new Event to become visible to the client after you create it in the dashboard. Likewise, if you define a schedule for the event, its phase changes will become visible to clients with some delay.
The PlayerModel.LiveOpsEvents member is part of the server-client shared player state and is accessible from PlayerActions. Therefore, you can write game logic that behaves according to what events the player is participating in. Additionally, the PlayerLiveOpsEventModel class has hooks you can use to run game logic code when an event's phase changes.
In this example, we'll make the Event count the number of button clicks along its duration. We're assuming the button in question is already in the game and an action called PlayerClickButton exists and is invoked when the player clicks the button.
First, let's augment the ButtonClickingEventModel with a method for incrementing the number of clicks during the event:
public class ButtonClickingEventModel : ...
{
    ...

    public void OnButtonClicked(PlayerModel player)
    {
        // Only count clicks while the event is truly active, and not in preview or review phase.
        if (Phase.IsActivePhase())
        {
            player.Log.Debug("Click recorded in button clicking event {EventId}", Id);
            NumClicksDone++;
        }
    }
}
Then, we'll call this method in PlayerClickButton, for each ongoing event:
[ModelAction(ActionCodes.PlayerClickButton)]
public class PlayerClickButton : PlayerAction
{
    public PlayerClickButton() { }

    public override MetaActionResult Execute(PlayerModel player, bool commit)
    {
        if (commit)
        {
            ...

            // Call OnButtonClicked() for each ongoing ButtonClickingEventModel.
            foreach (PlayerLiveOpsEventModel liveOpsEvent in player.LiveOpsEvents.EventModels.Values)
            {
                if (!(liveOpsEvent is ButtonClickingEventModel buttonEvent))
                    continue;

                buttonEvent.OnButtonClicked(player);
            }
        }

        return ActionResult.Success;
    }
}
Now, while the Event is active, it counts the button clicks. Let's now make the event grant the rewards when it's over if the player clicked the button enough times. We can do this in the ButtonClickingEventModel by overriding OnPhaseChanged().
public class ButtonClickingEventModel : ...
{
    ...

    protected override void OnPhaseChanged(PlayerModel player, LiveOpsEventPhase oldPhase, LiveOpsEventPhase[] fastForwardedPhases, LiveOpsEventPhase newPhase)
    {
        // Grant the rewards to the player when the event moves to the Concluded phase.
        // This happens after the event has ended, just before the event is removed from PlayerModel.
        if (newPhase == LiveOpsEventPhase.Concluded)
        {
            if (NumClicksDone >= Content.NumClicksRequired)
            {
                player.Log.Debug("Player reached {NumClicks}/{NumClicksRequired} clicks during event, granting rewards (event {EventId})", NumClicksDone, Content.NumClicksRequired, Id);
                foreach (MetaPlayerRewardBase reward in Content.Rewards)
                    reward.InvokeConsume(player, source: null);
            }
            else
                player.Log.Debug("Player reached only {NumClicks}/{NumClicksRequired} clicks during event, not granting rewards (event {EventId})", NumClicksDone, Content.NumClicksRequired, Id);
        }
    }
}Finally, our button-clicking Event is now implemented! If you followed the guide up to here, you can try out the event's operation in the following way:
This example should help you get started with implementing your own events. Here are a few suggestions for further improvements you'd probably need in a real game: