
Appearance
Offer Lifecycle
This document walks through the lifecycle of an in-game Offer in a live game.
This document walks through the lifecycle of an in-game Offer in a live game.
Because Offers are entirely data-driven and defined in your game configs, you can manage their whole lifecycle over-the-air without shipping a client update. This page walks through the stages of that lifecycle: adding a new Offer, testing it, rolling it out, monitoring its performance, and finally removing it.
Adding a new Offer or Offer Group is done by adding the corresponding rows to the Offers and OfferGroups config sheets and publishing an updated game config. The steps are the same as the ones described in the Quick Guide:
Offers Config Sheet.OfferGroups Config SheetSchedule.* fields) and Lifetime/Cooldown to control exactly when and how long the Offer Group is shown. These fields are described in the OfferGroups Fields section.After having added the data, build a new game config an publish it.
After publishing, the Offer becomes available to all players that satisfy the targeting and scheduling rules of the Offer and its Offer Group. As with any game config change, it's best to make and verify the change in a local or staging environment first and then promote it to production. See Working with Game Configs.
Before showing a new Offer to all players, validate it in a controlled way. This section list possible approaches for testing various aspects of an offer.
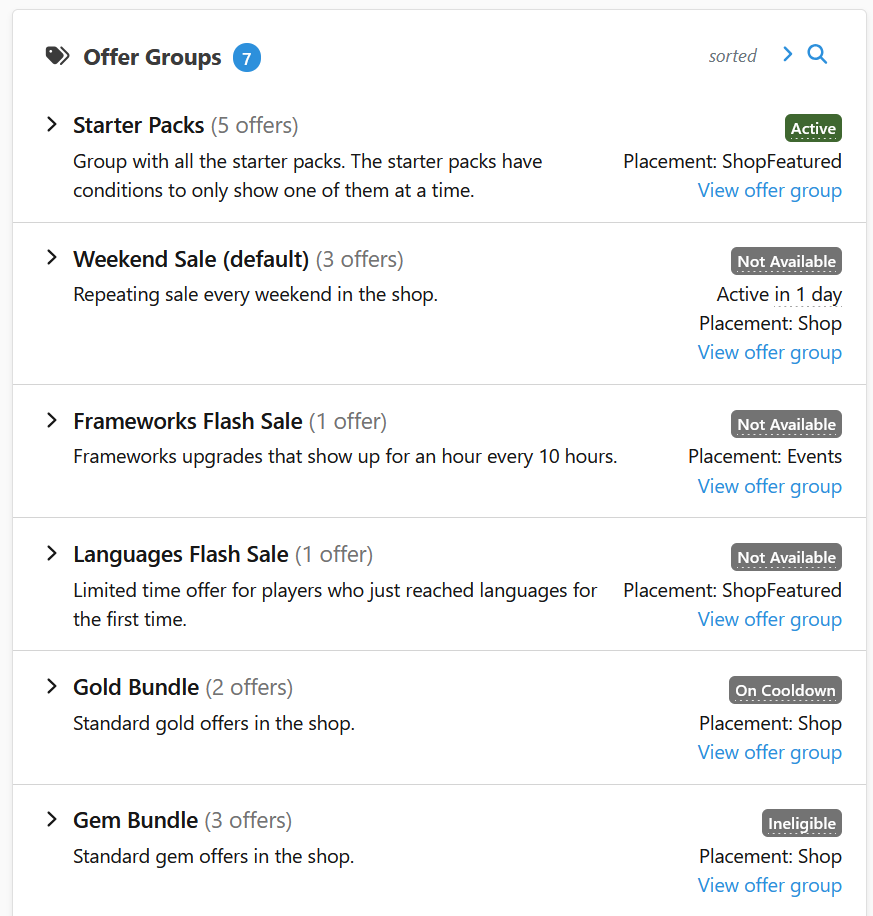
The Offers page in the LiveOps Dashboard shows all configured Offer Groups and Offers. This can be used to confirm that the new entries built correctly and have the expected contents, price points, and targeting. See Step 9: Validate the Offers in the LiveOps Dashboard.
To check that the Offer behaves and displays correctly in the client, you can force-enable the Offer Group for a single player. This activates the Group for that player regardless of its schedule and targeting, so you can exercise the in-game UI and purchase flow on demand.
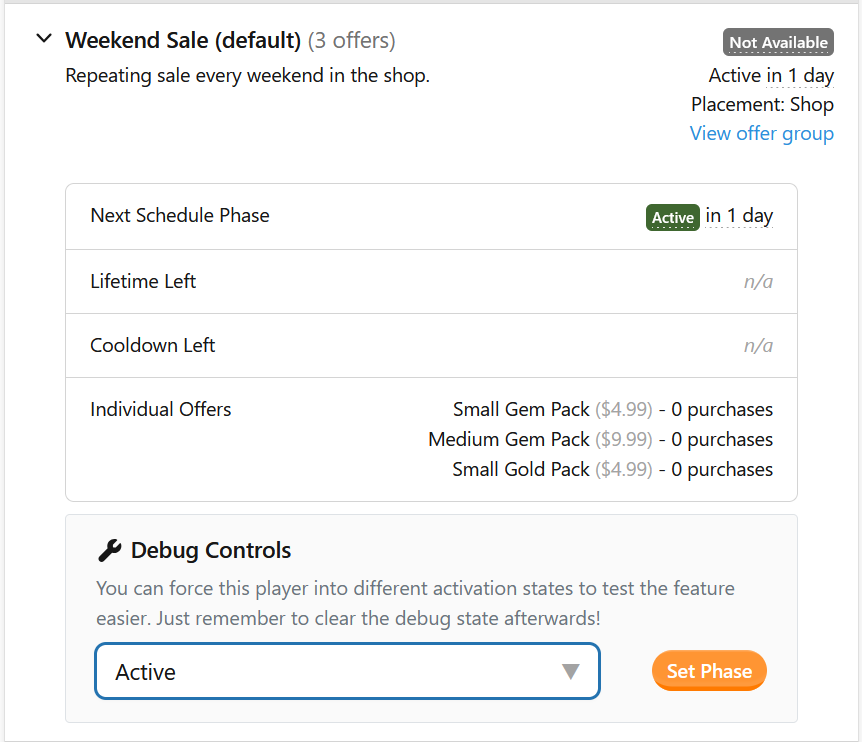
You can use the debug phase control on the player's page in the LiveOps Dashboard to force-enable the offer.
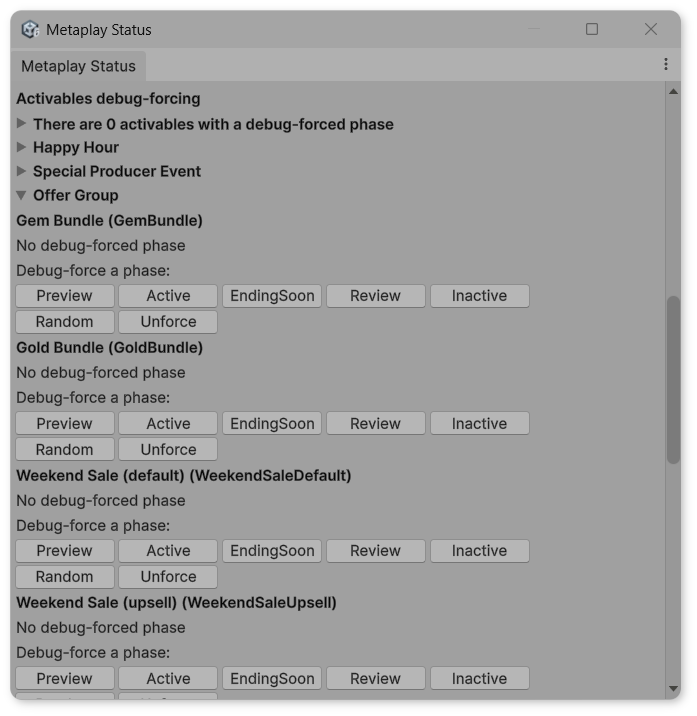
Alternatively, and conveniently for testing in a local environment, you can force-enable an offer from the offers debug tool in the Unity Editor. Note the Unity tooling requires your player must be among the Developer Players, or the current environment has Development tools enabled.
TIP
Force-enabling bypasses the Enabled field. You can publish a new Offer Group as disabled (Enabled = false) so it affects no real players, and still force-enable it for your own test accounts — force-enabling activates even disabled Groups.
Confirm that the Offer resolves to the price point you intended and that the price shown in the client is correct. The configured price point is listed on the Offers page in the dashboard. The actual store price displayed to players comes from the app stores and is usually only available in production. See Test in Production with Developer Players below for validating that safely.
If the Offer uses Segment targeting or Precursor conditions, check it on a player's page in the LiveOps Dashboard. An Offer Group the player doesn't qualify for is shown with the Ineligible phase. Verify it's eligible for accounts that should see it and Ineligible for those that shouldn't.
If the Offer Group uses a calendar schedule, check that it appears and expires at the right times by skipping the server's clock forward instead of waiting for real time. See Testing Game Schedules with Time Skipping.
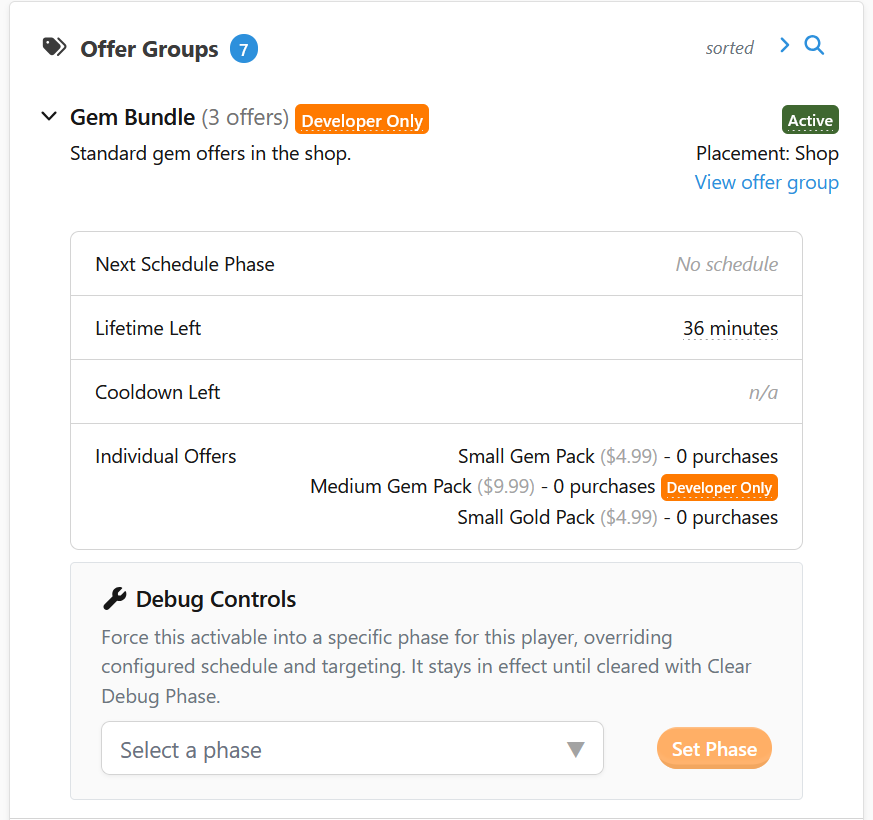
Some things such as real In-App Product price points exist only in your production environment, because IAPs are configured in the live app stores. To validate Offers safely in a production environment, you may set DeveloperOnly = true on the Offer and its Offer Group and publish to production. A DeveloperOnly Offer is shown only to Developer Players, allowing you to test against the real price points on your own accounts before releasing to everyone.
Once an Offer has been validated, release it to your players by lifting the gates you used while testing:
Enabled = false, set it to true so the Group activates normally.DeveloperOnly = true on the Offer or Offer Group for testing, set it to false to show it to all players instead of only to Developer Players.After an Offer is live, monitor how it performs:
Dashboard statistics. The View offer group page in the LiveOps Dashboard shows runtime information for each Offer Group and its Offers, such as the number of players that have seen the Group and how many have purchased. This is the quickest way to sanity-check that an Offer is being shown and converting as expected.
Analytics events. Offer purchases go through the normal In-App Purchase flow, so they produce the same purchase analytics events as any other IAP. For offer purchases, the PlayerInAppPurchased event also includes the purchased Offer, Offer Group, and Placement. To attach custom game-specific context to the purchase, pass a custom PurchaseAnalyticsContext as shown in Step 7: Implement Purchase Triggering.
Removing Offer Groups or individual Offers in them from the game is done by removing the entries from the game config and publishing an updated config. The associated state for tracking the activations and purchases in the Player Model will become orphaned for removed Offer Groups and Offers and will be marked for later deletion.
To protect against accidental data loss if publishing the wrong game config, the game server doesn't immediately remove this orphaned state from player models. Server internally retains the orphan state until a configurable delay period from the latest game config activation has passed. The delay is by default 24 hours and can be controlled with the Player:PurgeStateForRemovedConfigItemsDelay runtime option.